Do It Yourself Pilot CDI Build Up Instructions By Bill Keefe
Tools needed:
Grinder, belt sander, or equivalent.
Putty knife.
X-acto knife, a box knife, or both.
Soldering iron.
A good quality level.
Materials needed:
Correct electrical epoxy potting compound.
New plastic case.
60/40 rosin core solder
Wooden craft sticks.
Disposable cup.
Masking tape.
Warnings:
Do not use fiberglass resin to pot your case. The different expansion rates between the resin,
plastic, and potting compound will eventually lead to leaks.
Water inside your CDI unit is a bad thing.
Do not use silicone to pot your case. Some are corrosive and some are slightly conductive.
Use only the correct electrical epoxy potting compound. Don't use the wrong stuff.
Ground yourself when working around open circuit board to prevent damage from static electricity.
Don't cut yourself when working with the knives.
I now sell a kit for building these.
The kit includes a case, potting compound, solder, and the craft sticks. Price per kit: $25.
I will still build these. If you want yours done the price is to have yours built is $80 including
return shipping.
Procedure - Short version:
1. Test Box to ensure it is working properly.
2. Clean exterior with tooth brush and dish soap - pull connector clips and clean if necessary - Q-tips,
toothpicks & alcohol work OK inside connector plug.
3. Cut plastic case away - take your time here, do not cut so fast as to heat up the case.
4. Shave bottom perimeter of potting compound from circuit board. Trim until you see compound, then
pry away with putty knife.
5. Trim away excess potting compound. Notch bottom corners and pre-fit to case.
6. Ground yourself with copper wire to work bench whenever working around open circuit board.
7. Strip away potting compound from area around connection point.
8. Do solder joint.
9. Tape up case w/ masking tape and level a table. Table must be level or compound will drain
towards low side.
10. Mix up compound & wait 30 min. Re stir compound - you may want to use rubber gloves - the
compound sticks to your skin pretty good.
11. Take a wooden craft stick and cover the inside of new case with compound & also the bottom
corner of circuit board.
12. Press circuit board into case far corner, then slide it towards the edge with plug.
13. Fill in remaining voids with liquid compound taking care around connector and pop any bubbles
that may form at surface.
14. Wait 24 hours for compound to set up.
15. Test CDI box again.
16. Enjoy your no rev CDI unit!
Procedure - Long version: Step by step pictures of process in order and picture commentary:
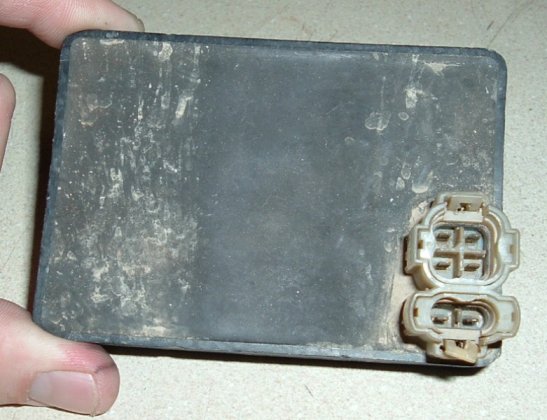
1. This is the box as received from Stoneman. It is dirty and has a broken clip in the CDI plug
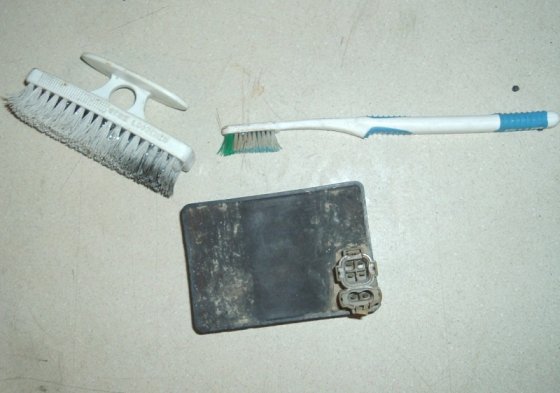
 2. First thing is to clean it. I use these brushes and Dawn dish soap and hot water to clean them.
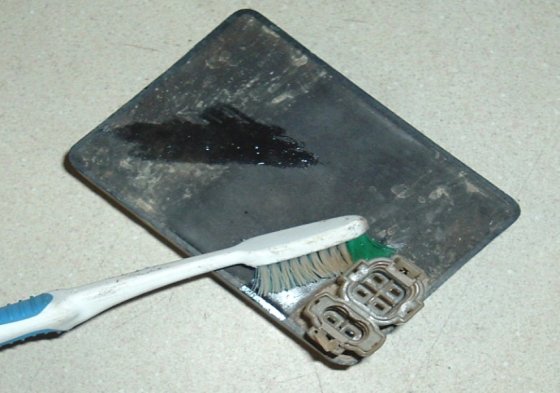
 3. The toothbrush works well for cleaning the base of the plug. Be careful to not get water inside
the plug while rinsing.
3. The toothbrush works well for cleaning the base of the plug. Be careful to not get water inside
the plug while rinsing.
 4. CDI unit is scrubbed clean. Blow it dry with compressed air if you have air. Note the
little clips on the plug.
4. CDI unit is scrubbed clean. Blow it dry with compressed air if you have air. Note the
little clips on the plug.
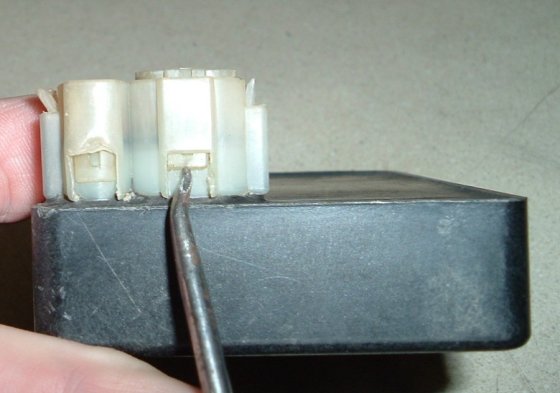
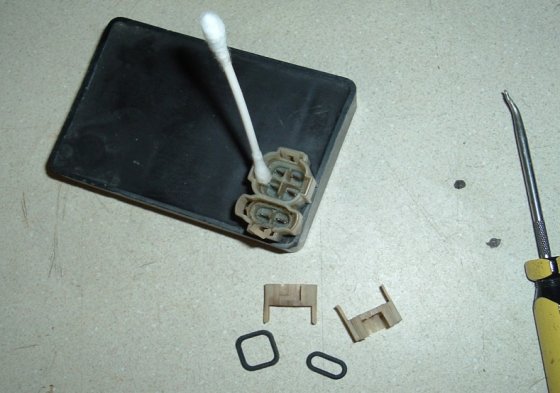
 5. Now to remove the plug clips to wash inside if necessary. Pull up on clips as shown to remove them.
I only do this on units that are dirty.
5. Now to remove the plug clips to wash inside if necessary. Pull up on clips as shown to remove them.
I only do this on units that are dirty.
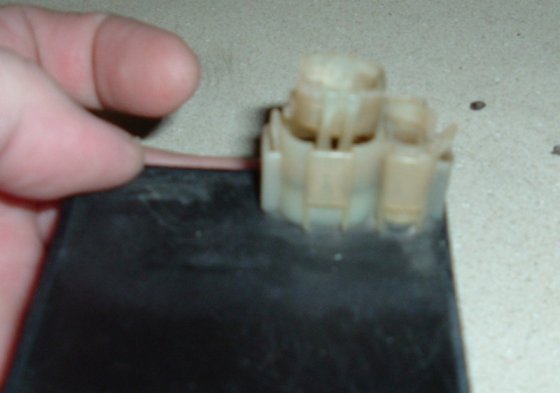
 6. The plugs will slide up and out.
 7. Now you can remove the o-rings from down inside the plug.
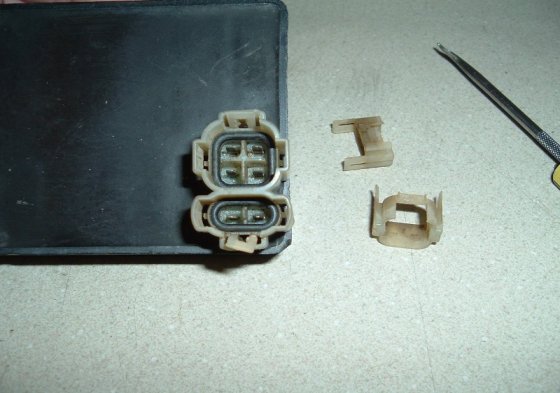 8. Clips and O-rings removed. DO not lose the o-rings or the clips.
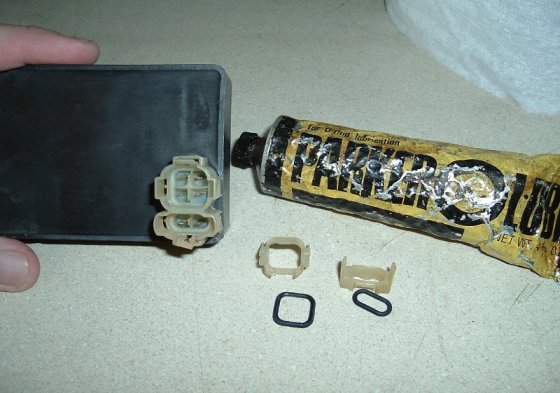
 9. Clean down inside the plug with Q-tips and Toothpicks and rubbing alcohol.
Blow it clean with compressed air.
9. Clean down inside the plug with Q-tips and Toothpicks and rubbing alcohol.
Blow it clean with compressed air.
 10. Scrub clips and o-rings clean just like the CDI case. Toothbrush work well for this.
Lube the O-rings .
10. Scrub clips and o-rings clean just like the CDI case. Toothbrush work well for this.
Lube the O-rings .
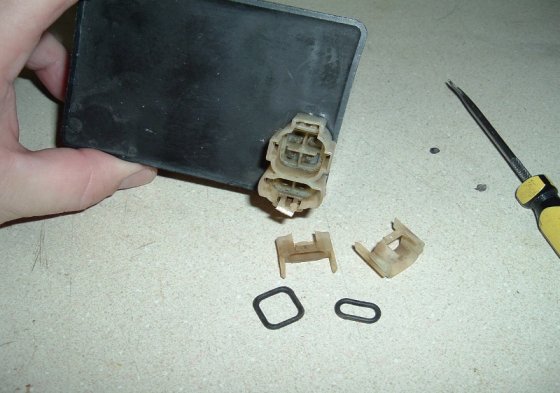
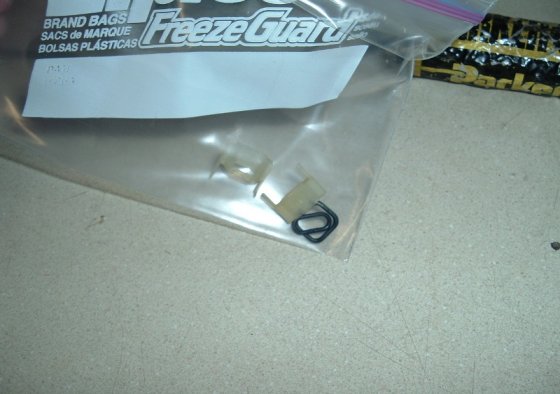
 11. Place the clips and O-rings in a zip lock bag and place in a safe location where they
will not be misplaced. They will be reinstalled as the last step.
11. Place the clips and O-rings in a zip lock bag and place in a safe location where they
will not be misplaced. They will be reinstalled as the last step.
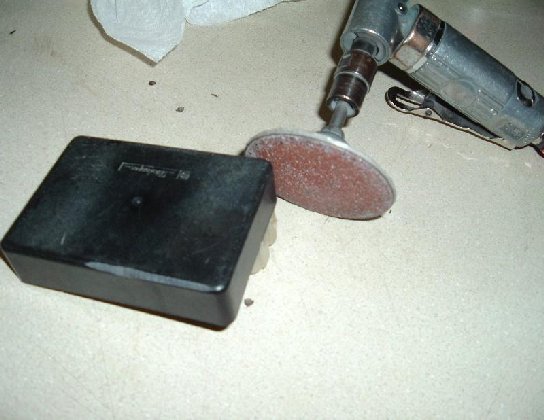
 12. Make a cut through the plastic around the perimeter of the bottom of the case.
I use a sanding wheel like this one. Cut at a 45 degree angle like shown. A belt sander
or other methods will work fine also. Cut slowly so you don't heat up the box to much.
A little down one side, then opposite side etc. It would not hurt to put a ground strap
on you making a good path to ground grinding and sanding on plastic can and will
generate static electricity and could damage the CDI.
12. Make a cut through the plastic around the perimeter of the bottom of the case.
I use a sanding wheel like this one. Cut at a 45 degree angle like shown. A belt sander
or other methods will work fine also. Cut slowly so you don't heat up the box to much.
A little down one side, then opposite side etc. It would not hurt to put a ground strap
on you making a good path to ground grinding and sanding on plastic can and will
generate static electricity and could damage the CDI.
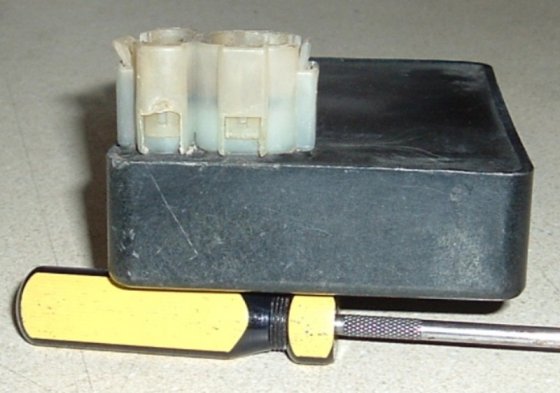
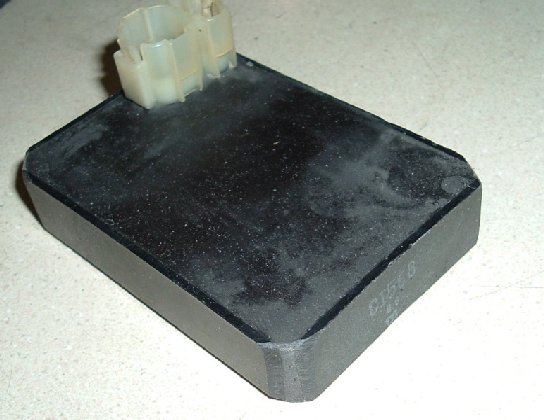
 13. Only cut deep enough so that the original potting compound is exposed below the plastic
as shown in this picture. I leave the perimeter edges alone until the bottom is removed.
It helps support the circuit board as the bottom is pried away.
13. Only cut deep enough so that the original potting compound is exposed below the plastic
as shown in this picture. I leave the perimeter edges alone until the bottom is removed.
It helps support the circuit board as the bottom is pried away.
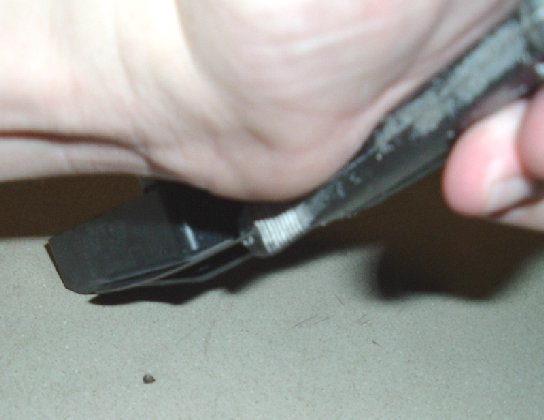
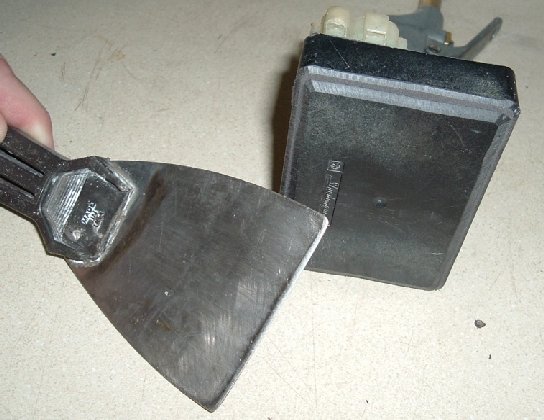 14. The putty knife I use is sharpened on the upper edge to help it slide between the plastic and
the compound. Wedge the putty knife in on a corner and wiggle it back and forth and side to side.
14. The putty knife I use is sharpened on the upper edge to help it slide between the plastic and
the compound. Wedge the putty knife in on a corner and wiggle it back and forth and side to side.
 15. Take you time here. Try and not break the plastic, or put undue stress on the circuit board.
 16. Almost there
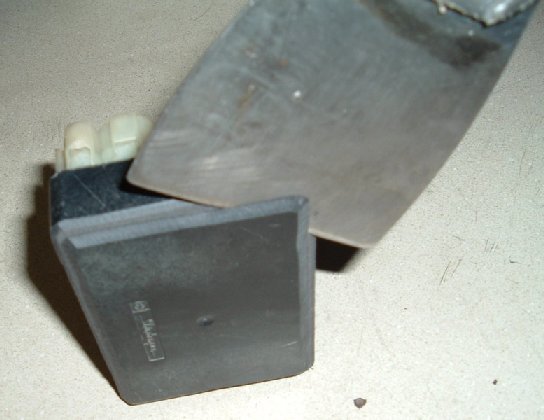
 17. Pull away the entire time you are cutting as shown so the pressure is always against
the plastic, not the compound.
17. Pull away the entire time you are cutting as shown so the pressure is always against
the plastic, not the compound.
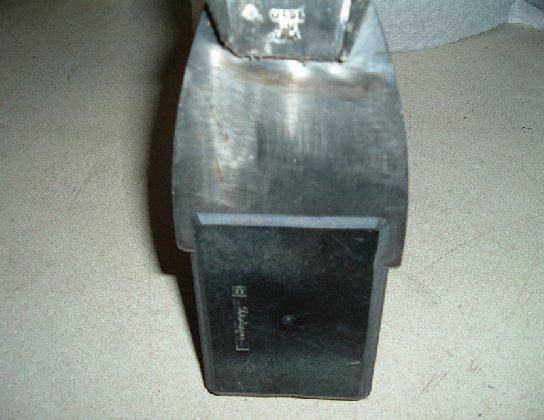
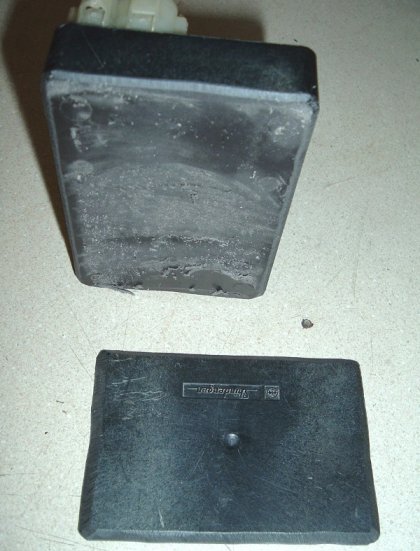
 18. When done correctly the whole bottom comes off as one piece.
 19. Now cut the perimeter edges through.
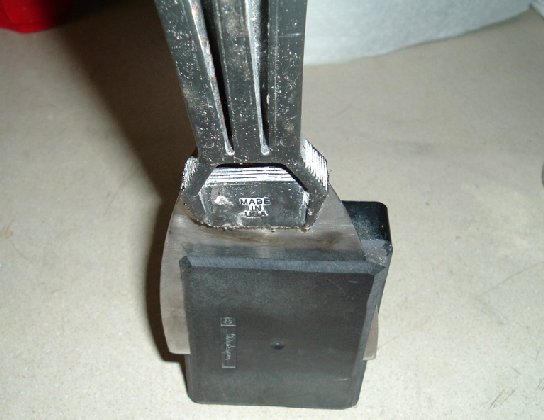
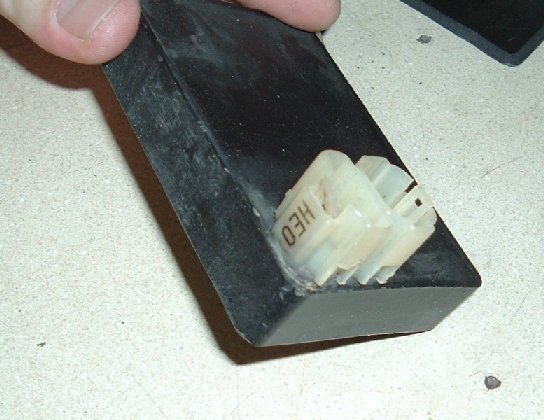
 20. Save the corner with the plug for last.
Next page